Product Overview
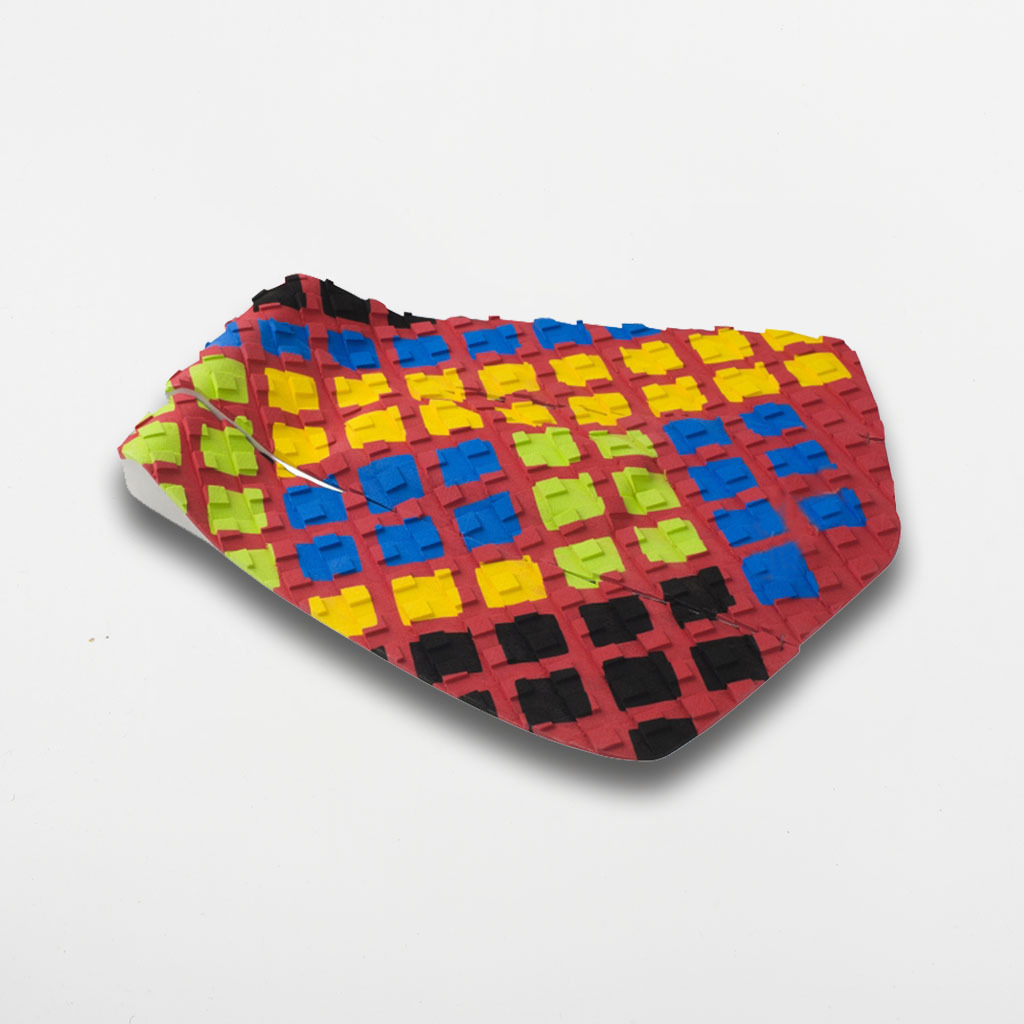
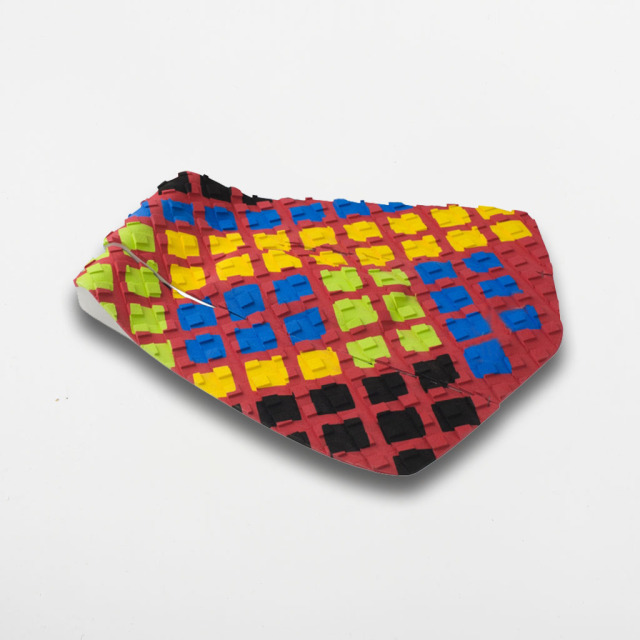
T27020 is a three-piece surf traction pad shaped for the tail of a board — the part of the deck under the back foot that does most of the steering. The face carries a square pattern: rows of raised square segments standing on a thin, flexible base, so the deck keeps a series of defined edges underfoot instead of a single flat sheet. Surf board manufacturers fit it during assembly, and shops stock it as a straightforward replacement part for a pad that has already given up. Because the set is split into separate pieces rather than one large moulded shape, it can be laid out around the tail the way the board actually curves. It also sits inside a complete accessory line, so a single order can cover the surf leash, fins, covers and racks that go with the same boards.
Set Layout & Square Grip Pattern
- Split layout. Separate pieces let a surfboard tail pad follow the tail as it narrows, instead of forcing one fixed outline that overhangs a squash tail or falls short on a pin.
- Square pattern. Raised squares give the back foot a row of edges to read against, so a rider can feel where the foot has landed without looking down mid-turn.
- Flexible base. The sheet is thin enough to sit down over vee, double concave or a slight step in the tail, and it holds that curve once pressed.
- Raised, not printed. Grip comes from the height of the segments rather than a surface coating, so wear shows up as flattened squares rather than a bald patch.
- Matte face. The surface is textured and matte rather than glossy, which keeps the pad reading as part of the board rather than an add-on.
- Matched pieces. Every piece in the set carries the same pattern and the same segment height, so a laid-out pad looks like one design rather than three parts.
Fitting & Placement
- Strip the old pad and clear every trace of wax with a soft scraper and a wax remover — a metal blade will gouge the deck and leave a ridge under the new pad.
- Wipe the tail down and let it dry completely. Adhesive grabs a dry, dust-free surface and will lift again from a damp one.
- Lay all the pieces out dry first, centred on the stringer, and check how a surfboard traction pad of this shape sits against your tail before any liner comes off.
- Mark the outline with pencil or tape so the pieces can go back in the same position after peeling.
- Peel only a short section of liner, tack that end down, then work along the piece — peeling and pressing as you go keeps the rest from grabbing the deck in the wrong place.
- Press the whole pad down from the centre outwards, working trapped air out with a thumb or a soft roller.
- Fit the fins and the leash after the pad, so nothing has to be lifted to reach a plug or a screw.
- Give the adhesive time to settle before the board goes in the water. - Dry-fit as long as you like. With the liner still on, the three pieces can be slid around the tail as many times as it takes. Nothing is committed until the backing is peeled, so take the time to walk the outline against the tail and the rear plugs first. - Tape the outline, not the pad. Two strips of masking tape along the rail line and one across the tail block give every piece a landing mark, so a piece that is lifted goes back where it came from rather than a few millimetres off. - Peel short, press short. Take up only the first few centimetres of liner, tack that end down, then peel and press along the piece. Holding the free end up and away from the deck is what keeps a surfboard tail pad from folding onto the board in the wrong place. - Lift early and slowly. A piece that has just touched down can usually be recovered — lift from a corner at a low angle, keeping the adhesive clean and off itself, and reset it. The window is short: once the full face has been pressed and rolled, the bond is set. - Roll, then leave it. Press from the centre outwards with a thumb or soft roller to push trapped air to the edge, then let the board sit before it goes near water. Adhesive strength builds over the hours after fitting, not in the first minute. - Know when to stop lifting. A piece pulled up after a full bond stretches the base and flattens the square segments, and it will not sit the same way again. At that point a fresh pad is the cleaner answer for the board and for the customer waiting on it. - Tail decks only. The three pieces are sized to sit behind the rear fin plugs on a surfboard, following a tail that narrows. On a skimboard the deck is flat and shallow with no tail kick to wrap around, and the rider's stance sits further forward — a skimboard deck piece cut to that outline is the part to order. - Bodyboards take a different pad. Prone riding loads the deck along the rails and around a raised arch, so a bodyboard deck pad is shaped for that surface rather than for a standing back foot. If your order covers several board types, tell us the deck each pad is going on and we will confirm which codes to put against them.
Tail Coverage & Board Matching
- Measure first. Take the deck width at the widest point where the surfboard tail pad will sit, and the distance from the tail block forward to the rear fin plugs.
- Shortboards. The pad usually runs from the tail block to just behind the rear plugs, with a tighter layout leaving the plugs and the leash plug clear.
- Longboards. A longboard traction pad under the back foot is a good start, but a longboard gets walked, so the tail piece works alongside a centre pad rather than replacing it.
- Pin and rounded pin tails. Bring the outer pieces in towards the stringer instead of trimming them; the set narrows without losing its pattern.
- Squash and swallow tails. Spread the pieces outward to cover the corners without crossing the rail line.
- Stance. A rider who stands with the back foot across the stringer gets more from a wide spread; one who keeps the foot centred is better served by a tight cluster.
- Stepped tails. Dry-fit before peeling. A hard step or a deep channel can leave one piece sitting slightly proud, and that is far easier to see before the liner comes off.
Who Buys This Pad
Surf board manufacturers fit this pad as a finishing part on new boards, and that is where the split layout earns its keep: a production run can be laid out from one template instead of trimmed by hand for every shape.
For wholesale distribution, the buyer is usually a category manager at a surf chain or the sporting-goods department of a supermarket, stocking replacement parts next to new boards. The pad sits naturally beside a surf front traction pad and the rest of the traction line, so a shelf can show a full deck-covering offer in one place rather than one lonely piece.
Surf schools and rental operators are the other steady buyer. A longboard traction pad that fits predictably and can be replaced straight from stock keeps a fleet on the water through a busy season. Independent shops buy in smaller runs and mostly want the pattern they reorder to look like the one already on the wall.
Maintenance & Replacement
Wax is the main enemy of a surfboard tail pad. Scrape off the worst of it with a plastic scraper, then work at the residue with warm water, a little mild soap and a soft brush. Keep solvents and acetone away from the edges — they soften the adhesive and lift a pad that was holding perfectly well.
Rinse the deck with fresh water when you can, and store boards flat or on a surfboard rack rather than standing them on the tail, which puts the whole board's weight through the pad. Never hang a board by its surf leash either; the strap pulls on the plug rather than the pad, and the board swings against whatever is behind it.
Heat is the other thing to watch. A board left in a hot car or a closed van softens the adhesive, and a corner that lifts on a hot afternoon is usually a corner that was left in the sun. Shade and airflow do more for pad life than anything else you can do.
Replace the pad when the surface has lost its edge and the back foot no longer reads it, or when an edge keeps lifting after being pressed back down. A small lift can usually be cleaned and re-pressed; a pad whose adhesive has gone hard and dry is finished.
Pairing & Accessories
- Fins. Honeycomb, timber, G10 glass and nylon fins in single tab, double tab and box systems, so a board can leave the workshop with its fin set already chosen.
- Surf leash. Regular, non-slip strap, Hypalon and SUP leashes, from a 6 ft lightweight leash for small to medium waves up to a 9 ft 8 mm longboard leash.
- Traction. A surfboard traction pad at the tail covers the part of the deck the back foot uses; centre pads, skimboard pads and waxless pads cover the rest of the board.
- Front grip. Forward of the tail, a surf front traction pad gives the front foot something to push against on wider boards and longboards.
- Covers. Basic bags, regular bags, stretch covers and bodyboard bags for boards going into storage, transit or showroom display.
- Racks. Travel rax and tie-downs, storage racks, display racks and bike racks — a surfboard rack is often ordered with the pads, because both are about how a board is kept between sessions.
- Wax and inserts. Wax, inserts and paddles fill out the accessory list for shops that want one supplier per shelf.
Specifications
| Property | Detail |
|---|
| Model | T27020 |
| Product type | Surf traction pad |
| Set contents | 3 pieces |
| Pattern | Square |
| Surface | Raised square segments, matte finish |
| Adhesive | 3M pressure-sensitive, applied across the back of each piece |
| Backing | Peel-off release liner |
| Board position | Tail deck |
| Attachment | Peel-and-stick; no glue, clamps or curing required |
| Colourway | Agreed against your approved sample |
| Branding | OEM and private-label production |
| Packing | Shelf-ready presentation agreed at order stage |
Ordering & Confirmation
- Confirm the quantity you need per pattern and colourway, not just a total pad count, so the mix matches what you plan to display.
- Ask your sales contact about sample availability, and sign off the pattern, colour and surface before a production run.
- Send the full accessory list — pads, fins, leashes, covers and a surfboard rack — in one go, so cartons and labels are planned together.
- Tell us at quotation stage if the pad is going out under your own brand, and what artwork or labelling you need.
- Set the delivery date against your launch date rather than assuming a standard turnaround; seasonal stock needs to land before the season, not during it.
- Keep the approved sample on file. Every reorder is matched to it, which is how a surf traction pad stays visually consistent from one delivery to the next.
- Confirm what your customs and product compliance teams need — packing list, carton marks, product labels — before production starts.
Scale & Supply Capability
CIMI is a factory-based supplier with 16 years in surf and watersports hardgoods, manufacturing at our own facility rather than sourcing through traders. Chain stores, supermarkets and surf-brand stores buy from us because one supplier covers a full accessory assortment, so a season's order and its reorders can be planned together. We take on OEM and private-label work, adapting designs, colourways and branding to your programme, and we schedule production against your agreed range plan. Send us your buy list and target dates, and we will confirm what we can make and when.
FAQ
Can the pad be fitted over an old traction pad?
No. A surfboard traction pad needs to sit directly on the deck. Two layers trap air between them, the top pad rocks underfoot, and the edges lift first. Strip the old pad completely, take the residue off the deck and let the tail dry before fitting the new set.
Can I reposition the pad if the first placement is wrong?
Usually, if you catch it early. Once the adhesive touches a clean, dry deck a surf traction pad grabs quickly, so lift from a corner and peel back slowly rather than pulling the whole piece. If it has already set and the position is wrong, the pad is better replaced than re-used — the adhesive will not hold the same way a second time.
Is this pad suitable for a longboard?
It can be, with one adjustment. A longboard traction pad at the tail covers the back foot, but a longboard is walked, so most setups pair it with a centre pad forward of it. On a wide longboard tail, spread the outer pieces outward instead of bunching them at the stringer.
Can I use it together with a front traction pad?
Yes. A surf front traction pad sits forward of the tail piece and covers the part of the deck the front foot uses, while the tail pad handles the back foot and the turns. The two cover different ground rather than duplicating each other.
Will it work on a skimboard or a bodyboard?
This one is shaped for a surfboard tail. Skimboards and bodyboards use their own deck pieces — a skimboard pad or a bodyboard-specific pad — because the deck shape and the way the rider stands are different. Ask us which code suits the boards you are building.
What colour and pattern will I receive?
Colour and block layout are agreed against your approved sample before production, so what you sign off is what the run is matched to. The square pattern itself is fixed for this code; if you need a different pattern, raise it at quotation stage and we will tell you what is possible.