Product Overview
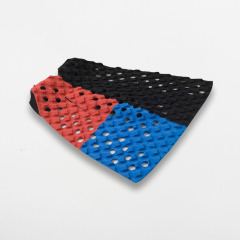
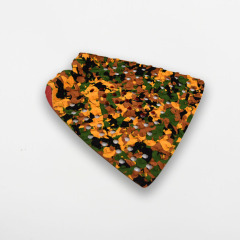
A grip pad for the tail of a surfboard. The set covers the patch of deck behind the back foot — the part a rider drives off through turns, and the part that takes the most pressure session after session. Each piece is pressed on separately, so the pad follows the curve and taper of the tail instead of bridging across it. Peel, align, press, and it stays where it was set. Surf board manufacturers fit it to new boards, shops fit it to used boards going back on the rack, and riders fit it when the old one has gone slick and the back foot starts to wander. Because it is a surf traction pad rather than a wax job, the deck stays clean, the grip works with wet feet, and the tail feels the same from the first wave of a session to the last.
Grip Surface & Pattern
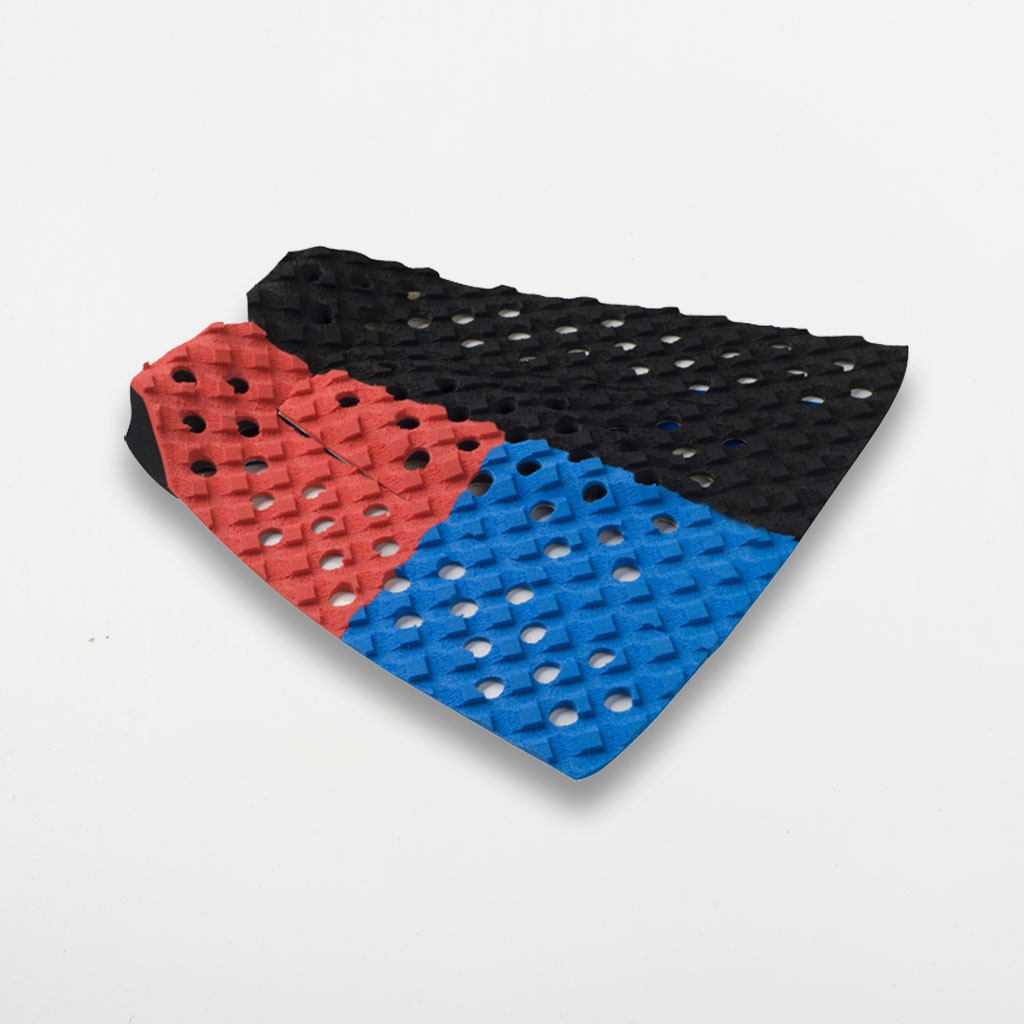
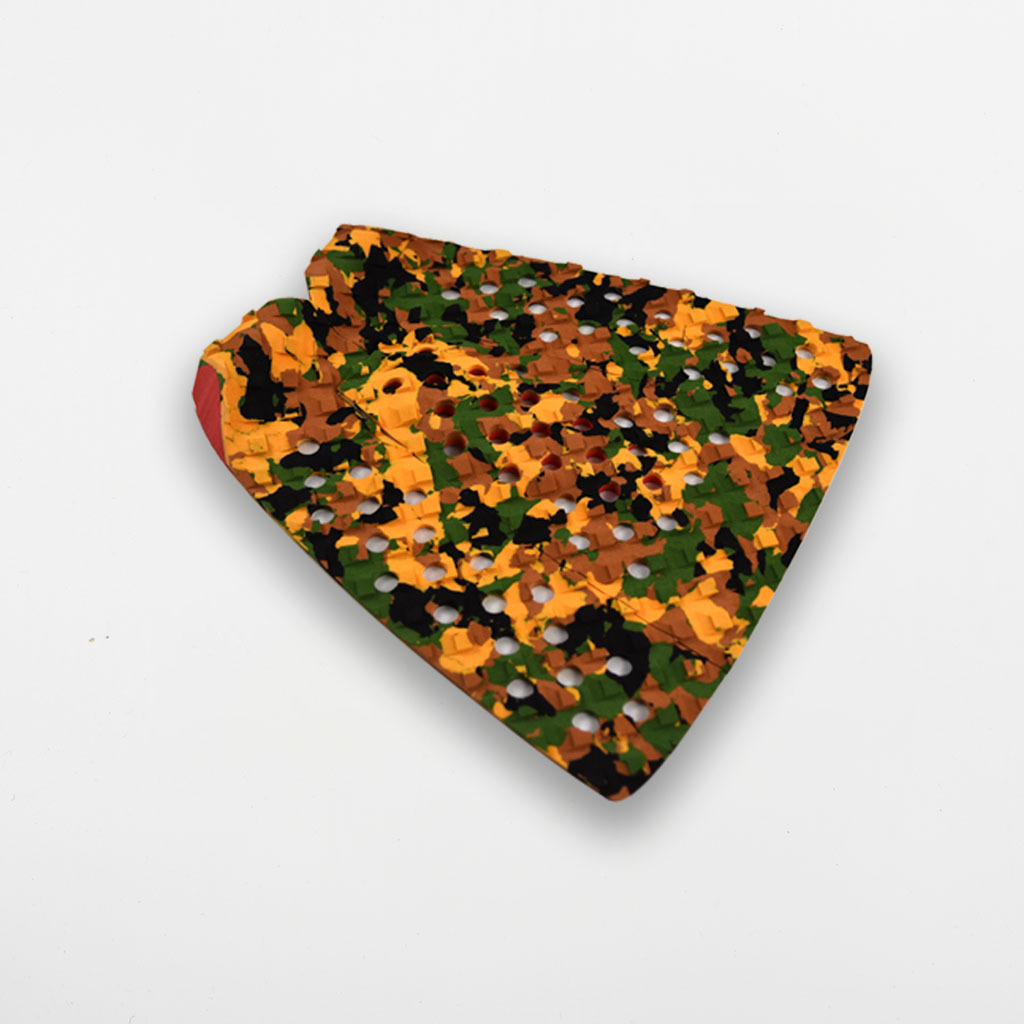
- Raised waffle deck. The foam is moulded into a grid of raised squares, so the sole of the foot presses into the gaps rather than skidding across a flat sheet. That is what keeps a wet back foot planted through a hard cutback.
- Small circular perforations. Holes punched through the foam give water somewhere to go instead of letting a film sit between skin and pad. They also take a little weight out of the set, which a light shortboard notices.
- Three independent pieces. A surfboard tail pad cut in three can be laid around a stringer, a tail channel or a leash plug without cutting anything, and each piece follows its own part of the tail curve.
- Contoured arched outline. The rear edge rises into a shallow arch that gives the heel something to push against, so the back foot finds the same spot again after a turn instead of hunting for it.
- Matte, wax-free surface. The foam is finished matte and grips on its own. Wax fills the waffle and the small holes, and once it does the pad behaves like a flat sheet — which is why the tail stays wax-free.
- Made for tapered tails. If you are picking a traction pad for surfboard tails that narrow quickly, a three-piece layout is easier to place than one wide sheet, because you can keep each piece parallel to the rail.
Fitting & Installation
- Take off the old pad. Prop the board deck-up so the surfboard fins sit clear of the floor, then work a plastic scraper under an edge and lift slowly, softening the old adhesive with a little citrus-based remover rather than a metal blade, which will gouge the deck.
- Clean the tail. If a surf leash is fitted, unclip it and lay it clear. Wipe the whole area with alcohol or a degreaser and let it dry completely — adhesive will not bond over wax, sunscreen, dust or damp.
- Check the layout dry. Lay the three pieces in place with the backing still on: centre piece on the stringer, side pieces following the rails, all of them clear of the leash plug and any tail channel.
- Mark the centreline. A strip of masking tape down the stringer gives every piece the same reference, and it peels away cleanly afterwards.
- Set the middle piece first. Peel a short section of backing, line the piece up on the tape, press from the centre outwards and work any air towards the edges.
- Add the two side pieces, keeping the gaps between them even and parallel to the rails so the set reads as one pad.
- Press the whole surfboard traction pad down firmly, run a thumb along every edge, and let the board stand before its first session.
Matching Gear
- Leashes that match the tail. Regular, non-slip strap, Hypalon strap, bodyboard and SUP models are all part of the range, so the surf leash on the board can come from the same supplier as the pad and arrive on the same order.
- Fins for the same board. Honeycomb, timber and glass surfboard fins in single tab, double tab and box fittings let a shop finish a board's tail end without splitting the order across suppliers.
- The rest of the traction range. Centre pads, waxless pads and skimboard pads sit alongside this traction pad for surfboard tails, which helps when a shop wants a full traction section rather than one model on its own.
- Covers. Basic bags, regular bags, stretch covers and bodyboard bags protect a board in transit and keep the new foam clean until it reaches the customer.
- Racks. Wall racks, storage racks, travel rax and tie-downs, display racks and bike racks keep boards off the floor in a store or a workshop, which is where most pads get scuffed before they are ever surfed.
Riding Applications
- Performance shortboards. The pad sits over the tail and kick, under the back foot, on the patch that takes the fastest wear. A fresh surfboard traction pad restores the connection between foot and tail on a board that has lost it.
- Everyday beach breaks. Wet feet, spray and board shorts — a textured surfing traction pad keeps the back foot planted between sets without reaching for wax.
- Longboards and mid-lengths. A longboard traction pad sits behind the tail kick and leaves the nose clear for cross-stepping; on a mid-length it saves wax on the section most walked over.
- Surf schools and rental fleets. Shared boards wear their grip quickly. A standard three-piece model keeps replacement simple and keeps every board in the rack looking the same.
- New board builds and refits. Shops and board builders fit the pad once the board is finished and the surfboard fins are in, before it goes on the rack, into a bag or onto a customer's shoulder.
Care & Replacement
A pad wears from the inside out. The waffle tops round off first, then the foam compacts under the heel and the deck starts to feel flat and slightly slick even though it still looks whole — that is the moment to replace it, before the grip goes completely. Heat is the other thing to watch: a board left in a hot car, leaning against a dark wall or sealed under a black cover softens the adhesive and lets the edges curl. If a corner lifts, press it back down while the board is cool and dry; if it lifts again, the pad has given what it can. Store boards on a rack rather than standing them on the tail, and keep the tail out of direct sun between sessions. A longboard traction pad usually goes first along the back edge, where the heel sits, so check that line whenever you look the board over.
Specifications
| Model | T27036 |
|---|
| Product type | Surf traction pad |
| Set | 3 pieces |
| Pattern | Square |
| Adhesive | 3M self-adhesive backing |
| Deck texture | Raised waffle |
| Perforations | Small circular holes |
| Outline | Contoured, arched tail shape |
| Surface finish | Matte foam |
| Wax required | No |
| Placement | Tail and kick zone of the board |
| Fitting | Peel-and-stick, no tools |
| Branding | OEM and private-label production available |
Model Codes & Range
Every surf traction pad in the range carries its own code, and that code is what identifies the design. T27036 is the set described on this product. The neighbouring codes in the family — T27018, T27026, T27034, T27038, T27042 and the rest — are separate items, each with its own pattern and graphics, not other sizes of this one. When you build a pad line for a shop, choose codes that genuinely read as different designs on the shelf rather than several that look alike once they are out of the packaging.
The one to watch is T27036B. It stands beside T27036 as its own item, so treat the two as separate codes and confirm which one your order, your board model or your private-label specification calls for before production is booked.
If you are replacing a surfboard tail pad rather than stocking a range, order by the code printed on the old backing sheet or its packaging. Where the old pad is worn past reading, send a photo of it still on the tail, the width across the deck where it sits and the layout of the pieces, and we will match it against the range. Two pads that look close in a photograph can differ in outline once they are laid on a tapering tail, so ask for a dry-lay picture of the pieces against a measured deck before you commit a full line.
Ordering & Confirmation
- Send the model code, the deck pattern you want and the quantity for each surf traction pad set, so the quote matches the right item in the range.
- Confirm the packing for each surfboard tail pad set — poly bag, header card, printed box, barcode or market-specific label — before production starts, because packing is settled at that point, not afterwards.
- Tell us the board models and tail widths you fit most often; if another pad shape in the range suits them better, we will say so before you commit.
- Ask your sales contact to confirm current lead time, shipping terms and the paperwork your market needs.
- Ask about sample availability if you want to check the foam, the adhesive and the pattern against a board before placing a full run.
- As surf board manufacturers we build against an agreed delivery date, and we keep pattern, foam and adhesive consistent on repeat orders when you reference your previous order.
Scale & Supply Capability
CIMI is a factory-based supplier with 16 years in surf and watersports hardgoods, manufacturing at our own facility rather than sourcing through traders. Chain stores, supermarkets and surf-brand stores buy from us because one supplier covers a full accessory assortment, so a season's order and its reorders can be planned together. We take on OEM and private-label work, adapting designs, colourways and branding to your programme, and we schedule production against your agreed range plan. Send us your buy list and target dates, and we will confirm what we can make and when.
FAQ
How do I check that this pad will fit my tail width?
Measure across the deck where the pad will sit — roughly the last stretch of tail behind the back foot — and compare it with the three pieces laid out dry. Because the pieces are set independently, they can sit slightly closer on a narrow tail or with wider gaps on a wide one, which is what makes a traction pad for surfboard tails that taper sharply easier to place than a single sheet. If the tail is very narrow or carries a deep channel, send us the width and we will point you to the pad shape in the range that suits it.
What happens if I set the pad crooked?
Press it once and it is down: the adhesive grabs on contact and will not slide into place. Lay the pieces out with the backing still on, mark the stringer with tape, then commit. If a corner touches down in the wrong spot before the rest is pressed, lift that corner slowly and start again. Once a piece has been fully pressed and has sat, pulling it up takes foam with it, and a surfboard tail pad that has been lifted loses its grip — fit a new one instead.
Do I need wax on top of it?
No. The foam is finished matte and the raised waffle does the work, so the deck stays wax-free and the back foot still holds. Wax works against you here: it fills the waffle and the small holes, the surface goes slick, and the drainage the perforations provide stops working. Rinse a dirty surfboard traction pad with fresh water and a soft brush, then let it dry out of direct sun.
Can I fit one to a longboard?
Yes. A longboard traction pad sits behind the tail kick, leaving the nose and the walking area clear for cross-stepping, and it saves wax on the section most walked over. Riders who spend time on the tail of a mid-length often run a tail pad with a centre pad in front of it; the three pieces here work as the tail piece on their own.
Does the pad get in the way of the leash plug?
No, as long as the plug is fitted first. Set the pad so the rear edge clears the plug and the surf leash has a clean run to the rail saver. On a board where the plug sits close to the tail, the three pieces can be spaced to leave a gap around it, which is one reason a segmented set is easier to work with than a single sheet.