Product Overview
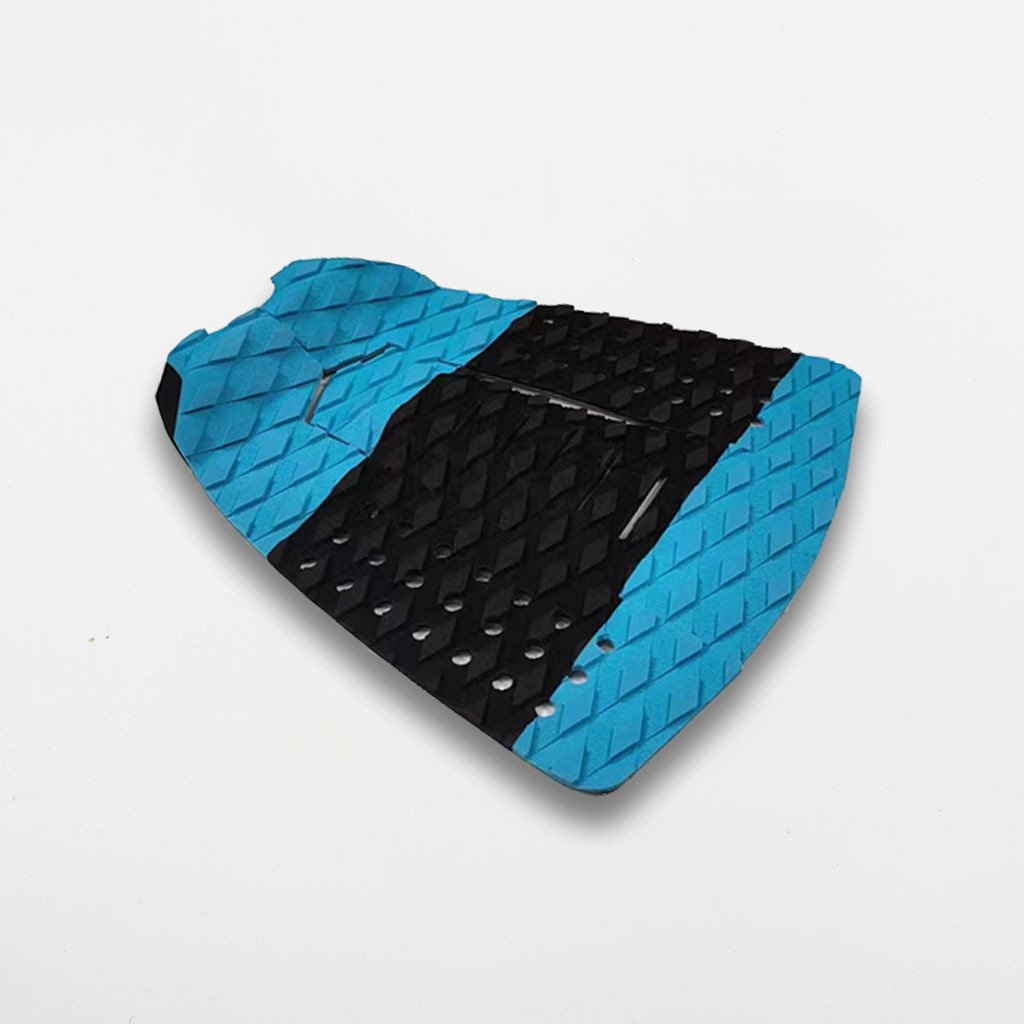
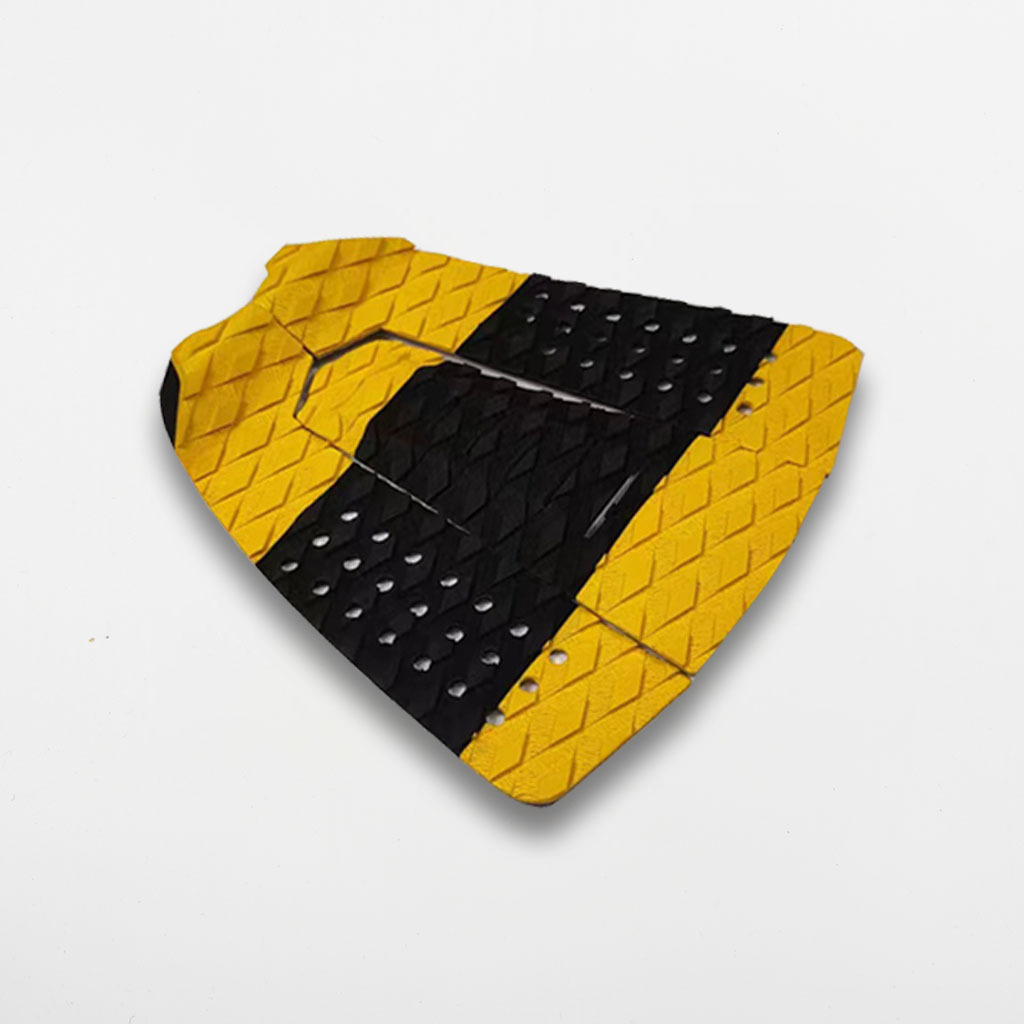
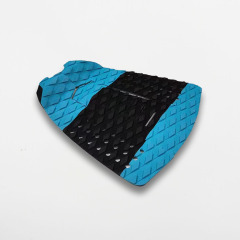
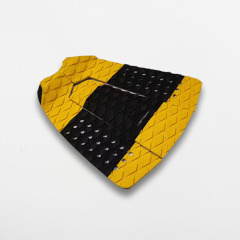
T00342 is a three-piece tail pad for the back of a shortboard, built around a moulded diamond grip pattern. The set pairs a black centre grip section with a coloured base — the pads shown here are the blue and yellow versions — and each panel is contoured so the assembly follows the curve of the tail instead of sitting on it like a flat tile.
Three pieces is a working decision rather than a styling one. Separate panels let the pad hug a curved tail without wrinkling at the edges, and the shallow gaps between them give the adhesive somewhere to move as it bonds. A raised ridge runs down the middle section, which gives the back foot a physical line to find when you shuffle back for a turn.
Underneath sits the adhesive. It decides how long a surfboard traction pad stays where you put it, and it is the reason the fitting steps further down the product matter more than the pattern does: it bonds to a clean, wax-free deck and to very little else.
Board builders fit this set before a new board leaves the bay. Shops keep it as the replacement for a customer whose old pad has gone smooth. Riders buy it as the last item on a re-grip list.
Diamond Grip Pattern
Raised diamonds. The grip is a moulded grid of raised diamonds, not a printed or sprayed texture. Underfoot they read as a set of small edges to push against, which is the difference between a pad you only notice when your foot slips and one you can drive off.
Perforated field. Small holes run between the diamonds across the whole surface. Water and loose wax have somewhere to go instead of sitting on top as a slick film, and the pad is drier underfoot when you paddle back out.
Centre ridge. A raised spine runs down the middle section. It gives the back foot a line to locate by feel, which matters most when you are shuffling back mid-turn and cannot look down at the board.
Matte finish. The surface is finished flat rather than glossy. It does not throw glare into your eyes in low morning light, and it hides the grey smear that wax leaves behind after a few sessions.
Grip under wax. The diamonds stand proud enough that a thin wax coat fills the valleys between them rather than burying the tops. That is why the pad is waxed lightly: a heavy coat flattens the pattern and takes away the edges you bought it for.
Segmented edges. Because the pattern stops at the edge of each panel, the outline stays crisp where the pad meets the board. There is no thin border of flattened texture around the outside waiting to lift first.
Together these are moulding decisions rather than surface decoration, so the pattern is part of the pad rather than a layer sitting on top of it.
Board Fit & Coverage
- Shortboard tails. The three panels are cut for the last stretch of deck, from behind the back foot to the end of the tail — the area you actually stand on when you drive off the back foot.
- Squash tails. The pieces sit close together with small, even gaps, so the set reads as one continuous surface across a wide, flat tail.
- Round and pin tails. The curve takes up more of the pad, so the rear panel is usually set slightly further forward and the gaps opened a little. Dry-fit first; that is the whole point of buying a three-piece set.
- Fish and grovellers. Wider tails take the panels with more space between them, which keeps the outer edges clear of the rail line.
- Longboards and wider decks. On a longboard the same three pieces cover proportionally less of the deck, and most riders want a longboard traction pad that runs further forward and wider. If your range leans that way, ask us about the longer format rather than stretching this set.
- Narrow tails. Where the tail is narrower than the pad, trim the rear panel with a sharp blade before fitting — outside edge first, keeping the centre ridge intact.
- Tail only. This is a surfboard tail pad, so it covers the back of the board and not the deck ahead of it. Shops that sell deck coverage carry centre pads as a separate line.
- Before you order. Send us the tail width of the boards you build or stock and we will confirm whether this footprint suits them; the pad outline goes out with the quotation so you can check it against a deck.
Leash Plug & Fin Box Clearance
- Dry-fit the whole set first. The surf leash plug and the rear fin box sit in different places from one board model to the next, so the only check that counts is laying all three panels on the actual tail before any backing comes off.
- Start with the plug. On most boards it sits on the stringer near the tail. Slide the assembly forward or back until the rear panel clears it, then tape the outline so the position is fixed.
- Never bridge the plug. Fitting over the top is the mistake that shows: the plug ends up buried under a new surfboard tail pad and has to be drilled out later. If no layout clears it, cut a notch in the rear panel around the plug instead.
- Then check the fin box. It is the slot that takes your surf fins, and where it sits close to the tail the trailing edge of the rear panel is the piece that fouls it. Trim that panel to fit around the box area — do not cut into the box or the surrounding laminate.
- Mark before you cut. A strip of masking tape down the stringer as a centre reference, plus two short marks at the rear edge, lets you put each panel back in exactly the same spot after every dry fit and after trimming.
- Trim on the bench, not on the board. Score the line with tape as a guide, cut the panel flat with a sharp blade working from the outside edge inward, and leave the centre ridge intact so the foot still finds it.
- Read the gaps, not the tail. Small, even gaps across the tail tell you the set is centred. A wide gap down one side usually means the whole assembly has shifted rather than that the tail is the wrong shape — slide it back and check against the stringer line.
- Fitting a run of boards? Dry-fit and trim one deck, record the trim line, then repeat the same cut across the batch so every board leaves the bay with an identical outline.
- Shops fitting to a customer's board: have the rider bring the board in, dry-fit the set on their tail in front of them, and trim around their plug and box there — it takes a few minutes and avoids a return.
Fitting Steps
- Strip the old grip and wax. Scrape the wax off with a plastic scraper rather than a metal one, lift any old pad, then wipe the deck down until no residue is left on the surface.
- Rinse and dry. Fresh water, then let the board dry completely. Adhesive will not bond to a damp deck, and a board that feels dry to the hand can still be holding moisture in the foam.
- Lay the surf traction pad out dry. Position all three pieces before you remove any backing and check that the gaps look even. Run a strip of masking tape down the stringer as a centre reference.
- Mark the outline. Two short tape marks at the rear edge are enough to put the set back in exactly the same place after you have peeled a panel.
- Peel and press from the centre out. Work one piece at a time, pressing firmly from the middle towards the edges so air is pushed out ahead of the adhesive instead of trapped under it.
- Let it settle. Leave the board flat and dry for as long as the adhesive manufacturer recommends before you wax over the pad or take the board in the water.
- Wax lightly at first. A thin base coat over the diamonds is enough. Too much wax fills the pattern, and a filled pattern is a smooth pad.
Care & Storage
- Rinse after every session. Fresh water lifts salt and sand out of the pattern before it dries into the valleys. A quick rinse of the surfboard traction pad takes less time than picking grit out of the diamonds afterwards.
- Skip the solvents. Degreasers, acetone and general-purpose cleaners attack the adhesive at the edges. Mild soap and water is all the surface needs.
- Take wax off with plastic. A plastic scraper or wax comb, worked along the pattern rather than across it, then a wipe for the residue. Metal scrapers round off the tops of the diamonds.
- Watch the heat. A pad left in a hot car or in direct summer sun can soften at the backing and lift along an edge. Shade is the simplest protection there is.
- Check the corners. Press down a lifting corner before it becomes a lifting panel. Once sand gets under an edge it travels, and a re-bonded corner full of grit rarely holds.
- Store it supported. Flat, or on a surfboard rack that carries the board along its length. A board leaning against a wall rests its whole weight on one tail corner and works that edge loose over time.
- Rinse the rest of the kit too. The same freshwater routine suits a surf leash and keeps salt out of the webbing and the rail saver.
- Know when to re-grip. When the diamonds feel smooth under a thumb and the surface has gone shiny, the pad has done its work. Replacing it before a trip is cheaper than losing grip mid-turn.
Specifications
| Specification | Detail |
|---|
| Model | T00342 |
| Product type | Surfboard tail pad |
| Set contents | Three separate panels |
| Panel layout | One centre panel with raised ridge, two side panels |
| Grip pattern | Diamond |
| Top surface | Perforated, raised diamond texture |
| Finish | Matte |
| Centre detail | Raised ridge along the middle section |
| Adhesive | 3M peel-and-stick backing |
| Board area | Tail deck, behind the back foot |
| Mounting | Peel-and-stick, no drilling |
Ordering & Confirmation
- Send your buy list and target delivery window. As surf board manufacturers supplying distribution chains and surf brands since 2007, we quote against the formats, colourways and quantities on your list rather than against a single code.
- Confirm the quantity split by format. Tell us how many sets of each pad, centre pad or deck item you need; a seasonal range is usually planned as a group rather than one code at a time.
- Agree packaging and branding. Shelf-ready packing, hang tags and private-label artwork are set per order, so confirm what your shelf and your label need with your sales contact.
- Fix the delivery window before the season starts. Production is scheduled against the date you need stock, so confirm current lead time and shipping terms with your sales contact before the order goes in.
- Add the rest of the hardware. If surf fins or leashes sit in the same seasonal buy, put them on the same list so packing and dispatch are planned together.
- Confirm the commercial terms. Payment terms, freight arrangement and label approval are agreed per order — nothing is carried over from a previous batch unless it is confirmed again.
- Leashes | Regular, Hypalon and SUP surf leashes, plus bodyboard leashes and non-slip straps Fins | Honeycomb, carbon and timber fins, plus G10 glass and nylon surf fins in single tab, double tab and box Traction | Tail pads, centre pads, skimboard pads and waxless pads, including longboard traction pad formats Covers | Basic bags, regular bags, stretch covers and bodyboard bags Racks | Travel, storage, display and bike racks, including a wall-mounted surfboard rack Wax and inserts | Basecoat and topcoat wax, wax combs, and fin and leash inserts Paddles | Hand paddles and swim training aids
Scale & Supply Capability
CIMI is a factory-based supplier with 16 years in surf and watersports hardgoods, manufacturing at our own facility rather than sourcing through traders. Chain stores, supermarkets and surf-brand stores buy from us because one supplier covers a full accessory assortment, so a season's order and its reorders can be planned together. We take on OEM and private-label work, adapting designs, colourways and branding to your programme, and we schedule production against your agreed range plan. Send us your buy list and target dates, and we will confirm what we can make and when.
FAQ
How many pieces are in this surf traction pad, and does that make fitting harder?
Three, and the split makes fitting easier rather than harder. Each panel goes down separately, so you can line the outer pieces against the rail line, check the gaps and adjust before the adhesive takes hold — with a single-sheet pad you get one attempt. The set arrives cut and finished, so on a standard tail there is nothing to shape.
How does this surfboard tail pad differ from the other codes in your range?
Base the choice on footprint and finish rather than on the code. This one is the three-piece diamond set with a raised centre ridge and a perforated surface; other codes in the family differ in pattern, outline and colourway. Tell us the boards you are fitting and the colours your shelf is missing, and we will point you at the codes that fill the gap rather than duplicating one you already carry.
Is the adhesive on this surfboard traction pad strong enough to re-stick if a corner lifts?
It is made for a single, clean application. A small corner lift can sometimes be rescued: ease the edge up, clean out any grit, let everything dry thoroughly and press it back down firmly. Once sand has worked under a whole panel, or the backing has lost its tack across the piece, replace the pad — a re-bonded panel usually lifts again at the first spell of heat.
Will it work on a longboard?
The three panels cover the back of a shortboard comfortably, but on a longboard they sit on a much wider deck and leave a lot of bare surface ahead of them. Most longboard riders want a longboard traction pad that runs further forward and wider, so if your range is longboard-led, ask us about the longer format instead of stretching this set.
How should I store a board with a new pad on it?
Flat, or on a surfboard rack that supports the board along its length. What damages a pad is pressure concentrated on one point: a board leaning against a wall rests its whole weight on a single tail corner, and that corner is where the adhesive starts to let go. Keep the board shaded and supported and the pad will sit flat between sessions.
Do I need different surf fins once the pad is fitted?
No. The pad sits on the deck and does not change how the board rides or which fins suit it. The one thing to check is the rear fin box: on boards where the box sits close to the tail, arrange the three panels so the trailing piece clears it, and trim the panel rather than cutting into the box area.
Will the pad cover the surf leash plug?
It can, so check before you peel anything. Set the three pieces out dry and slide the assembly forward or back until the plug sits clear of the rear panel. If the plug is so close to the tail that no arrangement works, trim the rear panel around it rather than fitting over the top — a covered plug means drilling through a new pad later.